Another Photo Processed – NGC6946 and NGC 6939

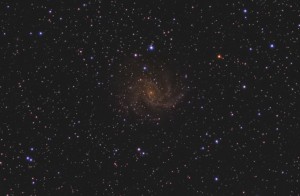
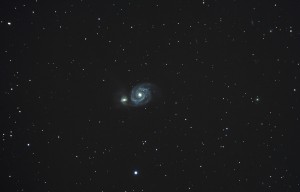
Completed processing another photo.  The work on improving the mount’s guiding and better understanding the guiding software seems to have paid off.  That, and the fact that it was a beautiful night, too, perhaps.

ngc6946_final_rev1_galaxy_crop

This was a night where I actually stretched out in the back of the truck and took a nap for a few hours under the stars… got up when my alarm went off, went to check the scope and it was still photographing away!  That hasn’t happened too often in my young photography career.

Also, hopefully, the image processing is improving.  In this case, the color doesn’t seem overwhelming from afar, but upon zooming in, it gets more and more colorful.  Works to nice effect in this instance, I think.

Besides processing, I also finished the “hypertuning” of my mount.  Testing, to date, has been limited to driving around my scope in the basement.  Hopefully, the clouds may lift tomorrow, and I can take some data to see whether I have done any good, or not.  It “sounds” better, at least!

Here is the full, uncropped image:

ngc6946_final

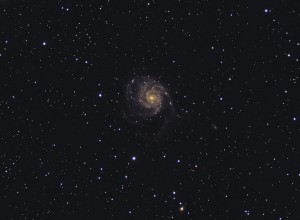
First Completed Image for 2011 – M101

M101_Rev4_FinalFinally finished up an actual image to publish…  This was shot on June 1, 2011, and is of M101, the Pinwheel Galaxy (aren’t they all?).

Besides this image, I have been busy trying to image with my new AT8RC, but with no success, yet.  I plan to outline some of my experiences since I last posted, then fill them in as time permits.  In addition to the trials of imaging with my new scope, I also completed an artificial light box to use for taking flats.  It seems to work well and is worthy of a separate article.  Also, I have changed most of my power distribution connections from the cigarette lighter types over to PowerPole connections.  They seem much more reliable.  Finally, the change from my Netbook Acer to an old Dell Laptop 620 has been a Godsend.  Crashes have just disappeared.

In summary, on the adventures of trying to image with the AT8RC, I haven’t been able to do it yet.  Sub frames have yielded very elongated stars.  While I spent considerable time worrying about polar alignment, it appears that I just am not currently able to track well enough to image in RA.  After purchasing and using PemPro to study my periodic error, I first diagnosed and tried to help things with an improvement to my mesh.  However, there still appears to be a significant component to my error that is being generated from the stepper motor gear.  To make a very long story short, I am currently planning to “hypertune” my mount while disassembling and reviewing the stepper motor gears.

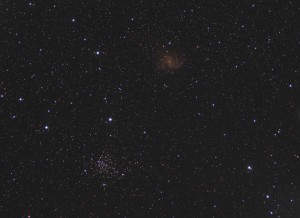
I also have two more images to process… one of M51 with this spring’s supernova in it, and also an image containing the Fireworks Galaxy and a nearby open cluster in the same image.

Stay tuned!


Polar Alignment – Part 2

As April is mere hours from becoming May, I am surprised and disappointed that I still haven’t been able to get out for a real night of astronomy.  Setting up this blog was exciting in February and March in anticipation of getting out, but at the end of April, it is the tiniest bit sad…

However, here we go anyway.

On an EQ-G, initial polar alignment of the mount can be achieved through the polar alignment scope and EQMOD’s polar alignment utility.  Through a simple series of steps, EQMOD will end up placing an alignment circle in the appropriate position.  The operator then uses the mount alt and azimuth controls to move Polaris into the small alignment circle, and polar alignment should be achieved to the inherent level of accuracy allowed by this method.  There are some nice pictures of the results in my previous post.  This is the approach I have used prior to this year, but I don’t really know whether it is good enough. 

From reading various yahoo groups, I suspect the majority of contributors would think that polar scope alignment method is not good enough for long exposures, and particularly, not good enough for long exposures at 1625mm focal length.   Additionally, a disadvantage of using the EQMOD utility is that the alignment must be completed without having the gear fully loaded on the mount, or the gear may collide into the tripod/pier.  Further, some suggest that fully loading the mount may induce some differential flexure and affect polar alignment.  Also, this approach means that the gear is always being set up after dark, after Polaris becomes visible in the polar scope.  The budding photographer may, at times, prefer to get set up before dark.

As an alternative to the polar scope alignment method (which is certainly more than adequate for visual observing), there are also software tools available that can make use of the main telescope to assist in polar alignment.  Here is one nice reference on polar alignment software.  For the most part, these polar alignment software tools fall into two main categories.  The first category relies on evaluating the difference between actual star positions and expected star positions to calculate any polar alignment corrections that are needed.  The number of iterations required for an adequate result is based on the accuracy of the initial rough polar alignment.  The second software category is a software-assisted drift alignment – a method that relies on observing the path a star deviates from its expected path over time, then calculating needed alignment corrections.

One software tool, Alignmaster, is a member of the first category.  I have only briefly tried to use this so I have yet to form a solid opinion.  Very first impressions are:

  • The “best” star pairs it wants you to use are often quite low to the horizon and hard to locate
  • It does not attempt to use any installed cameras, so these must be driven by other software (or you could use an illuminated reticule and do it visually)
  • If it works and is accurate, it is likely to be substantially faster than software assisted, drift alignment software
  • Some people in the “groups” say it works great

There are number of examples of the category 2 software, with prices ranging from “free” to $150+.  In several cases the polar alignment function is just one of a suite of programs included in the package.  While my instincts are to purchase the most expensive package first, maybe, for once, I will start instead with a free one.   One example of this program is EQ Align.  Although it sounds like it might be a member of the EQMOD family of software, it is not.   Again, based on no actual experience to date:

  • This software can fully integrate with both the mount and the camera
  • There are comments about earlier versions being buggy, but also those bugs have been resolved and the developers are very responsive
  • The program was developed in Spanish but is largely translated and seems fully usable to a non-Spanish speaker
  • The drift method is generally acknowledged to be the most accurate alignment method, but does take some time, because as the name implies, it depends on tracking how far a star drifts over time

In summary, the initial strategy I plan to follow is to switch my polar alignment method from the use of the polar scope to the use of a software assisted method described above.  Initially, it will be necessary to master the techniques in these methods and become proficient enough to be able to form an opinion as to which method is “good enough”.  Obviously the polar scope can still be used to approximate polar alignment by estimating the position of Polaris through the scope.  But the step of actually rotating the polar scope to align the correct hour-angle actually be done, and a visual approximate will instead need to be employed.

Hopefully, I will be able to report some initial results on these approaches soon… and also to comment on first light on my now  6-week old AT8RC.

Polar Alignment – Part 1

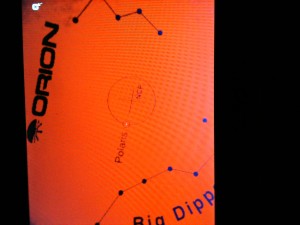
Actual view of laptop screen
Polaris perfectly aligned, right???

For the 2011 season, as I trek into the uncharted territory of capturing images at a focal length of 1625mm at f/8, it can only help to ensure that tracking is as good as it can possibly be.  It is easy to find research material about what works for others (qualified and unqualified), how good tracking must be for given image resolutions and other theoretical goals for producing excellent images.  That research highlights the important considerations for adequate tracking.  At some point, though, the experimenter/engineer in a person takes over and insists that he/she tests and confirms what works… with the proof, ultimately, in the pudding.   My quest for better tracking will initially focus on polar alignment.

Last season and before, my thought was to use the polar alignment scope, get Polaris in the little circle, and polar alignment would be good enough.  And perhaps at focal lengths of 714mm and under, it was acceptable.  But this season, my goals are to both achieve better initial polar alignment, and also assess the quality of alignment once the mount is all loaded up and ready to go.

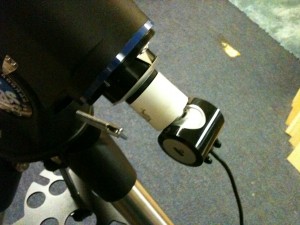
This entry introduces one tool that may help to improve polar alignment, a neat little trick that was first shared (as far as I know) at  astronomy shed.  This mod is simple and perhaps not really necessary, but it is really cool.  And it can certainly make things easier… which can lead to more accurate results.  In summary, the idea is to attach a web cam to the mount’s polar alignment scope, allowing the polar alignment to be completed in a comfortable, upright, human position, rather than crawling through the wet grass, looking through the polar scope at an awkward angle, and in the case of our club’s Greene County site, kneeling in cow patties!

Installed Webcam
My implementation of the polar cam

Here are additional pictures of my version of the mod, however the whole process is much better demonstrated in a video by Dion from Astronomy Shed.  To date, I have tested this in the front yard to get things focused, and to ensure Polaris will ultimately be bright enough to identified behind the light of the polar scope (and under a glaring street light).  So far, so good.  Looking forward to an actual night out soon.

Next time, more about Polar alignment.

While waiting for a clear night…

Patience is a necessity for astrophotography.  So many things can go wrong, expecially when you are a nomad without a permanent observatory.  I try to be a patient astronomer and astroimager, but in reviewing last year’s progress in my journal and in my hard disk archives, the queston keeps popping into my head, “Where are all the images?”  Then, however, I hit on an entry that made me smile:

May 7, 2010 – First time guiding and imaging together.  Was able to take 6 minute exposures for the first time.

So less than a year ago was the first actual guided image of anything over a minute.    Here is the image from that night:

m51_final_cropped_upright

First guided image, first picture of a galaxy.  Hooked.

So this year, with the new telescope from Audrey, exposures will have to be even longer, guiding will have to be even better, polar alignments will have to be impecable, and certainly, the images wil be more spectacular.  And surely a warm clear night will be coming soon.

Patience.