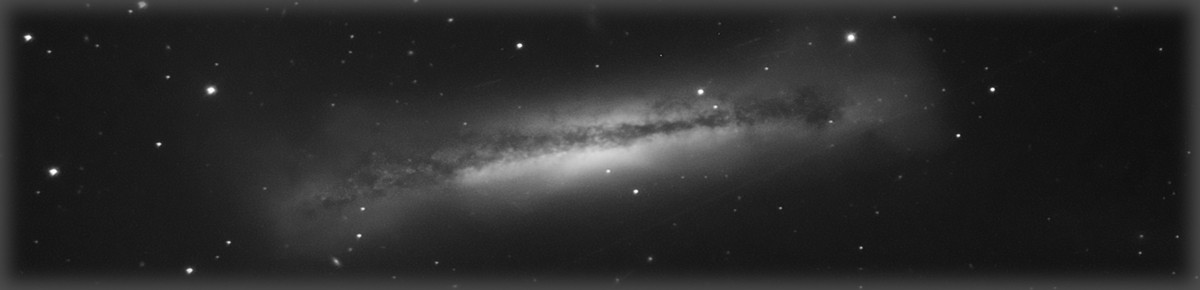
Last weekend and this one, the skies were clear enough to allow a bit of testing on the back patio. The next few days will bring a more detailed entry on the steps between the WSP and today, but here is a little test image (actually a quick stack of 16 5-minute sub frames). Just enough of a taste to be encouraged I am on the right track with this setup. This is both the first automated test with SGP and the first successful test through the AT10RC reduced to somewhere around 1600 mm via the AP27TVPH.
M106 Test Image – from my back patio
It appears I can be a little less conservative with my pick-off mirror placement and also like I should get busy on my larger flat box and my collimation technique. But an encouraging start, just the same.
So I changed a number of things all at once. Not in a controlled, engineering way, but in a desperate Northeast Amateur Astronomy way that reflects precious few clear nights each year. Because I was heading off to the WSP with no opportunity to test my new Astro-Physics 1100GTO mount on targets more distant than the basement ceiling, I was determined to be happy with getting things up and running. Any images I was able to capture would be icing on the cake. And it would be warm.
In addition to the coming out party for the 1100, a major change from last season is the switch over to Sequence Generator Pro (Main Sequence Software) for image acquisition and session management. An immediate benefit of the switch to SGP is the opportunity to exploit their automated focusing routine. If all goes well, this will replace the clunky operation of slewing to a bright star to do manual focusing with a Bahtinov mask and then slewing back to reacquire the target. To slightly complicate things further, I am moving away from AstroTortilla’s blind solver as the primary plate solving tool and on to PinPoint as the main solving engine with Astrometry.net as the blind fail-over solver.
And finally on this trip, I wanted to test out an AT10RC scope that has been patiently waiting in storage for a ride on the new 1100. My plan was to test it both at native focal length and reduced with an AP Telecompressor (the 27TVPH).
So… I felt that if I could get most of these things tested and successfully running, it would be a very successful week. And it would be warm.
Phase 1 – SGP
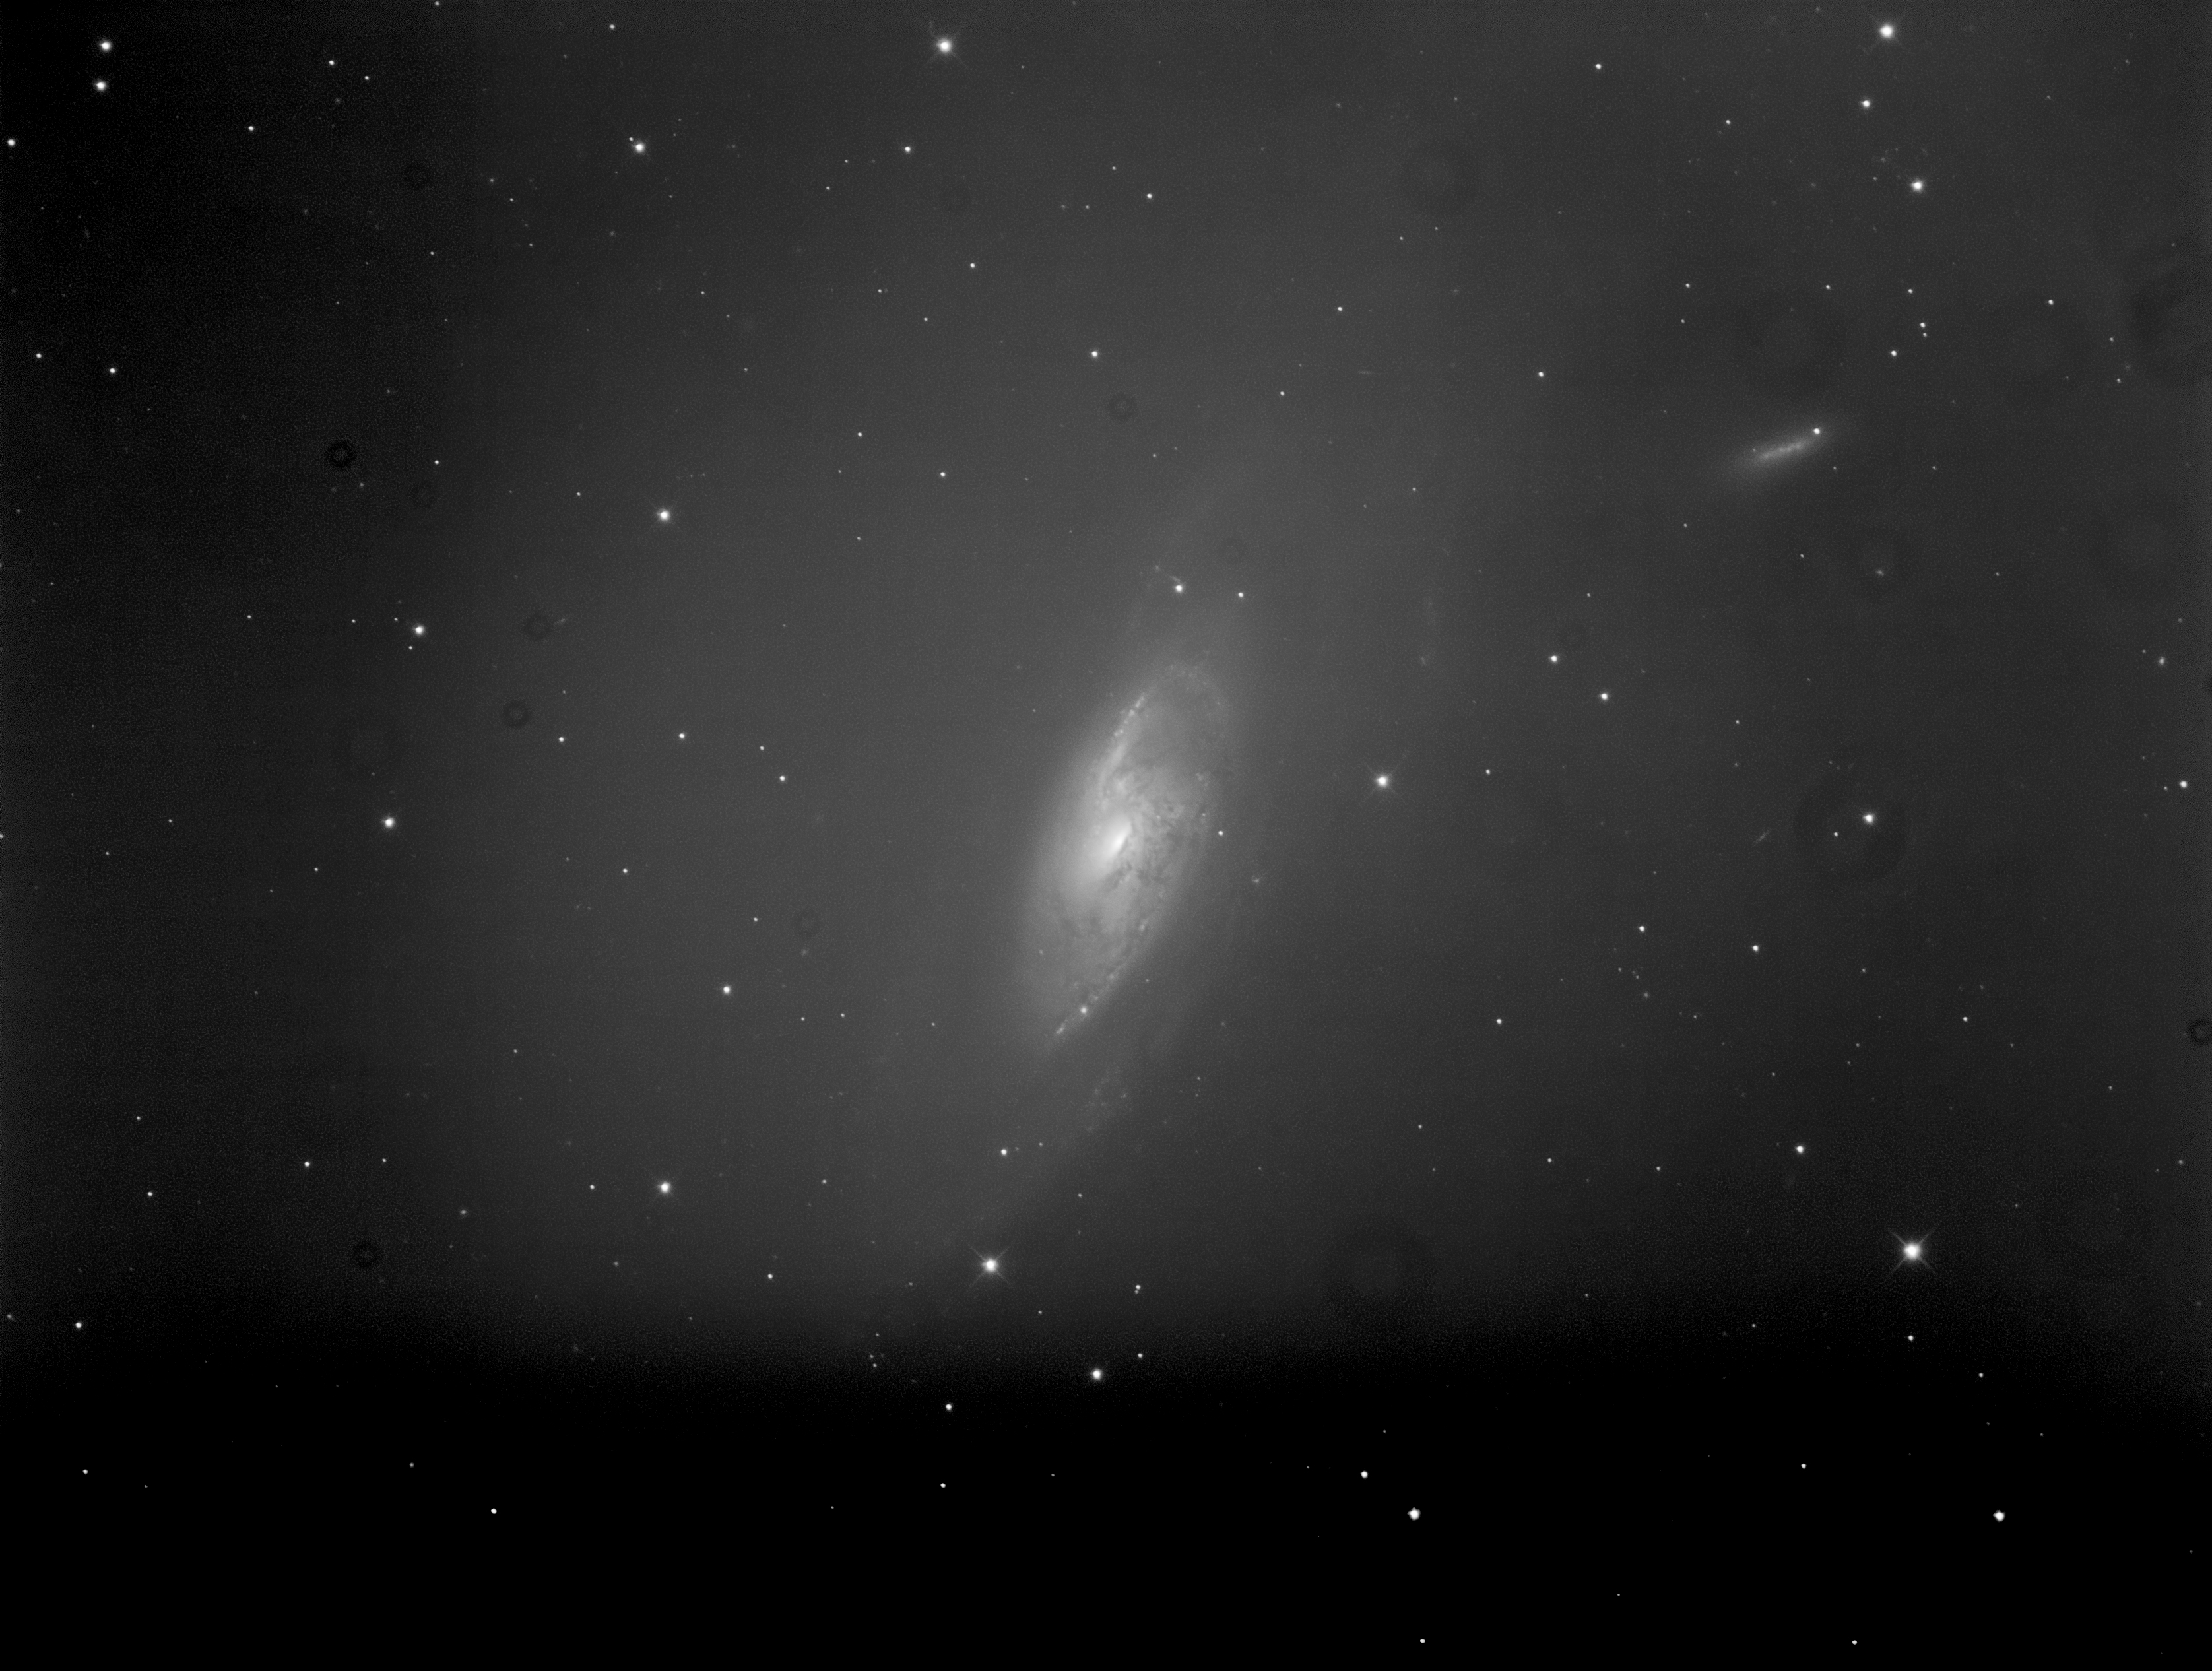
2015 Test Image from WSP – M1
As with any image in any of these blog entries, you can click on an image once to get a full browser view and click on it again to get a full, original resolution view. Click your browser’s “back” button to return here.
This M1 capture was the first capture with SGP. The main goal, other than actually using SGP was to use SGP’s focus routine. And getting the paths and file naming figured out. And interfacing with PHD2. And… well, you get the idea. M1 isn’t particularly suited to 770mm of focal length, especially when reduced to 616mm at f/5.6, but it was high overhead at the right time. This quick capture is a stack of 7 15-minute frames of Ha data. This isn’t cropped and shows pretty nice (but not perfect) star shapes all the way to the edges of the 8300 chip.
Phase 2 – Plate solving
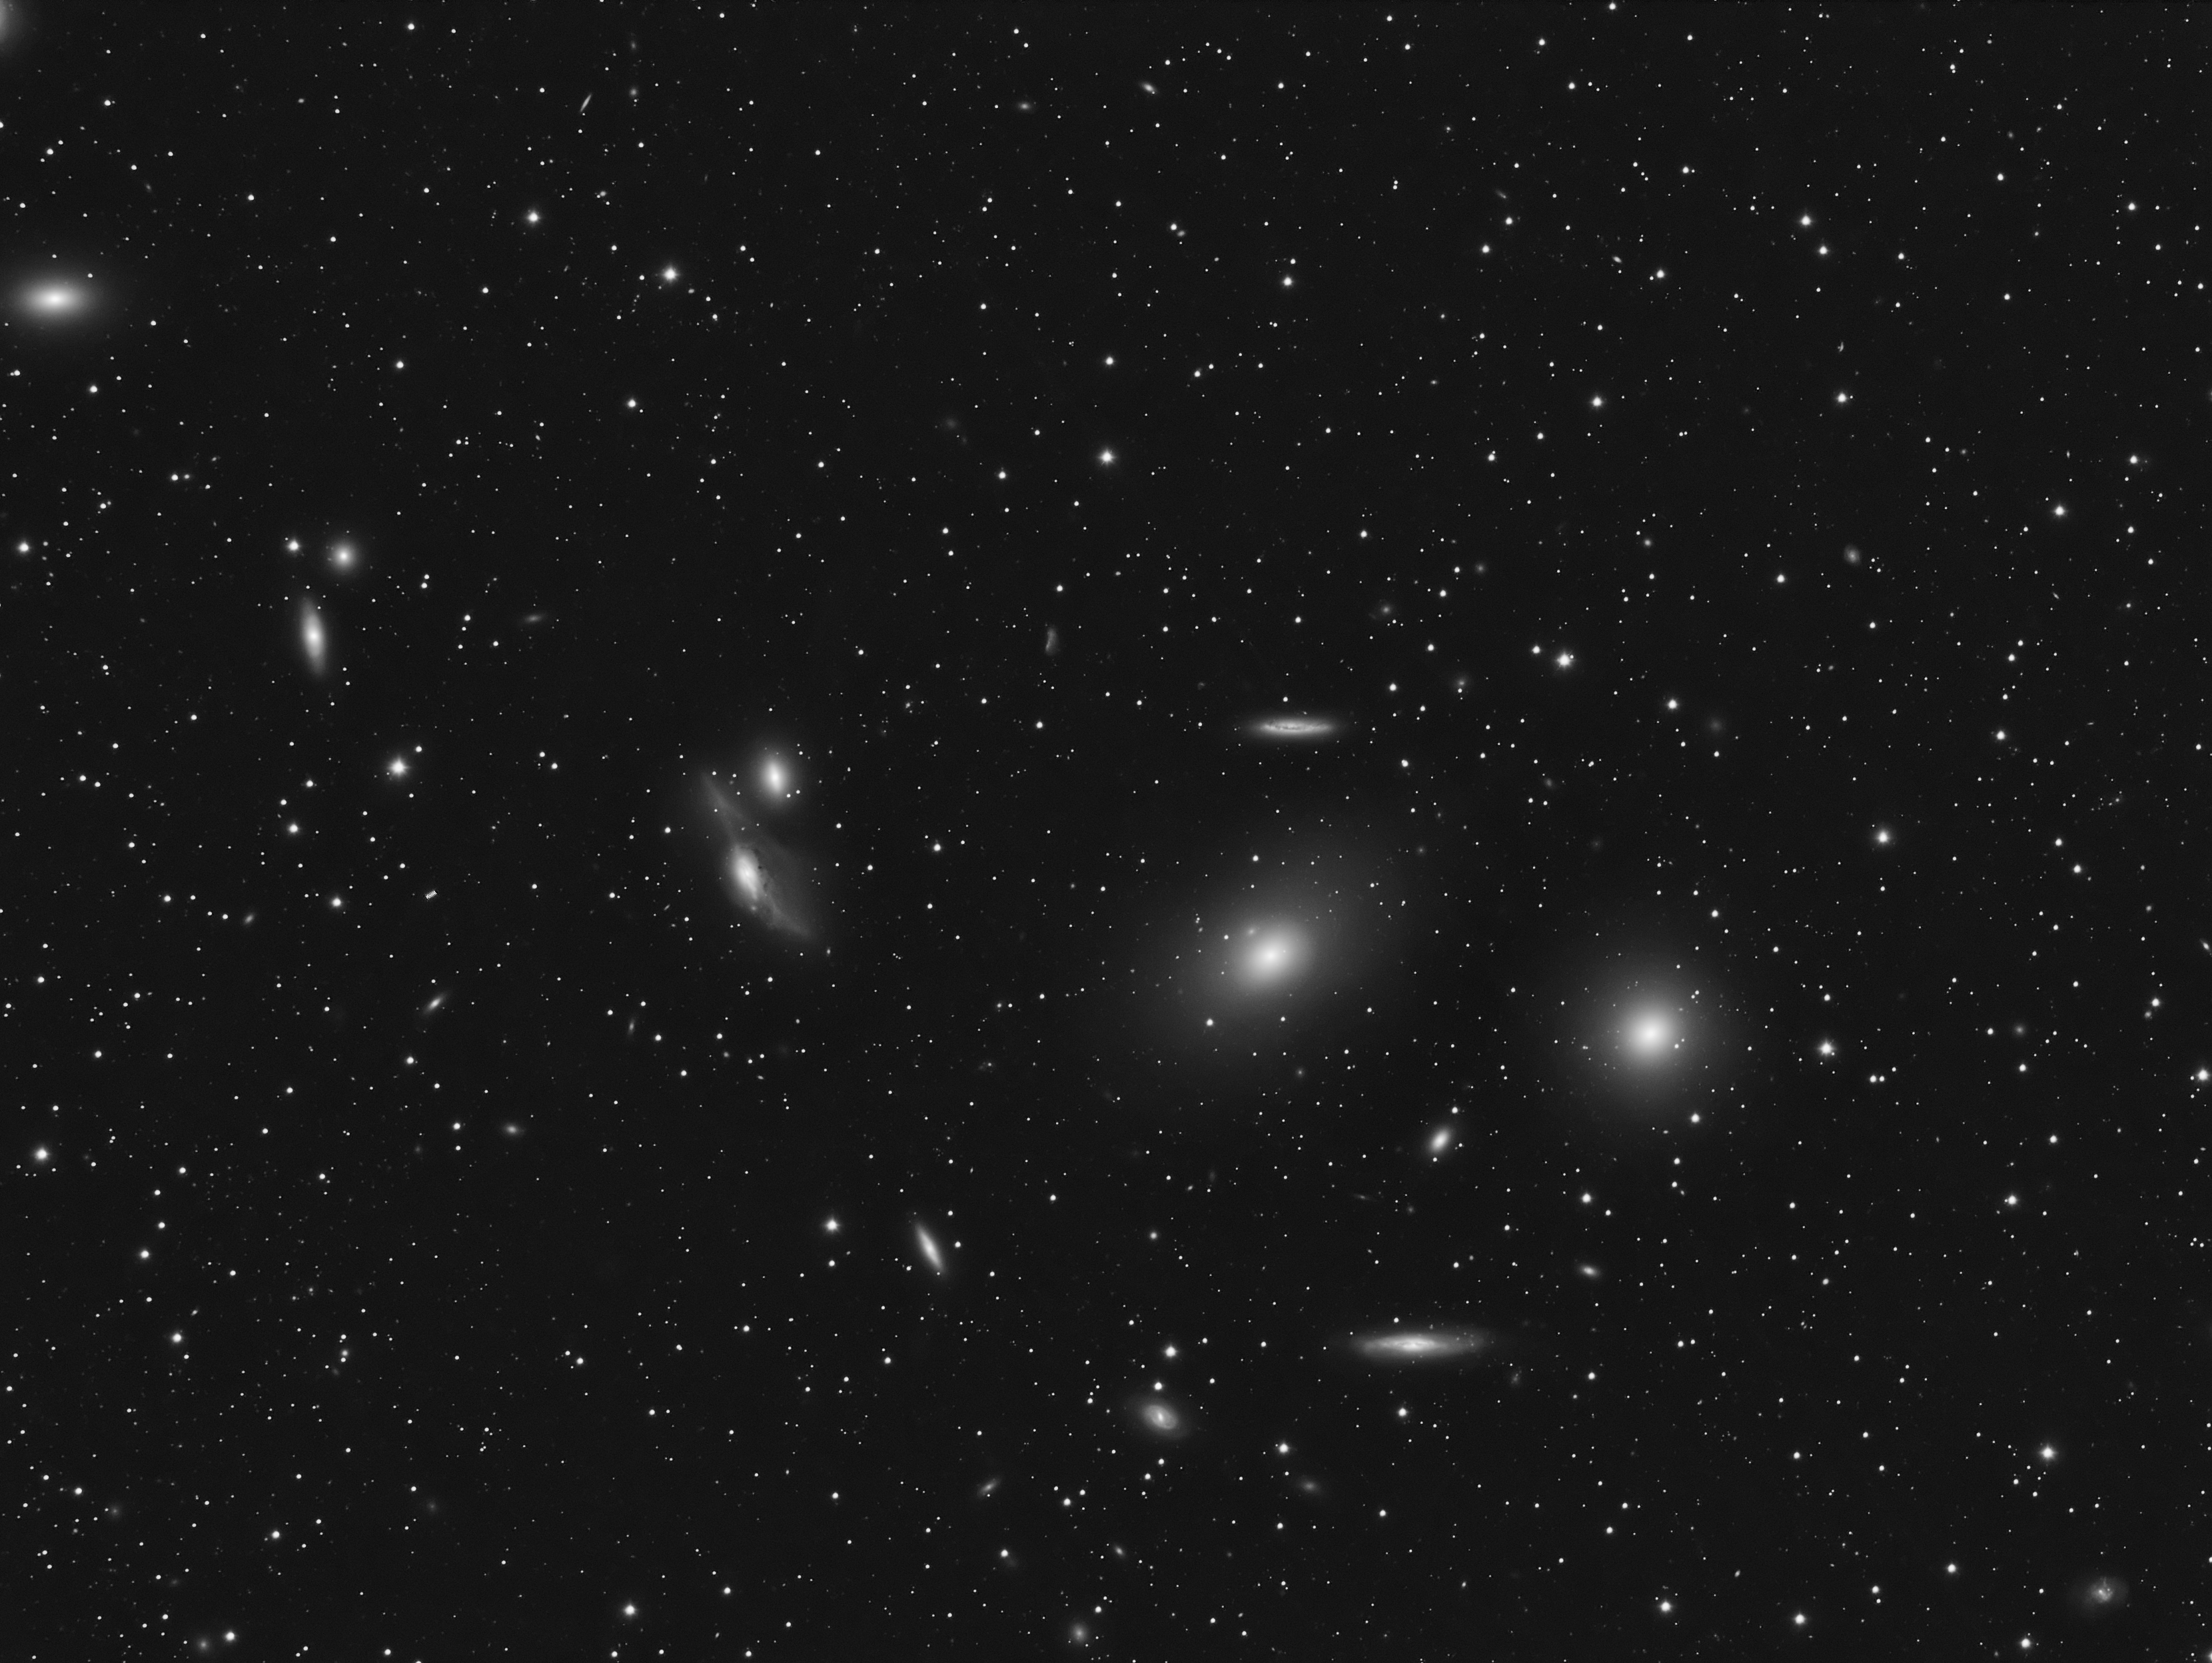
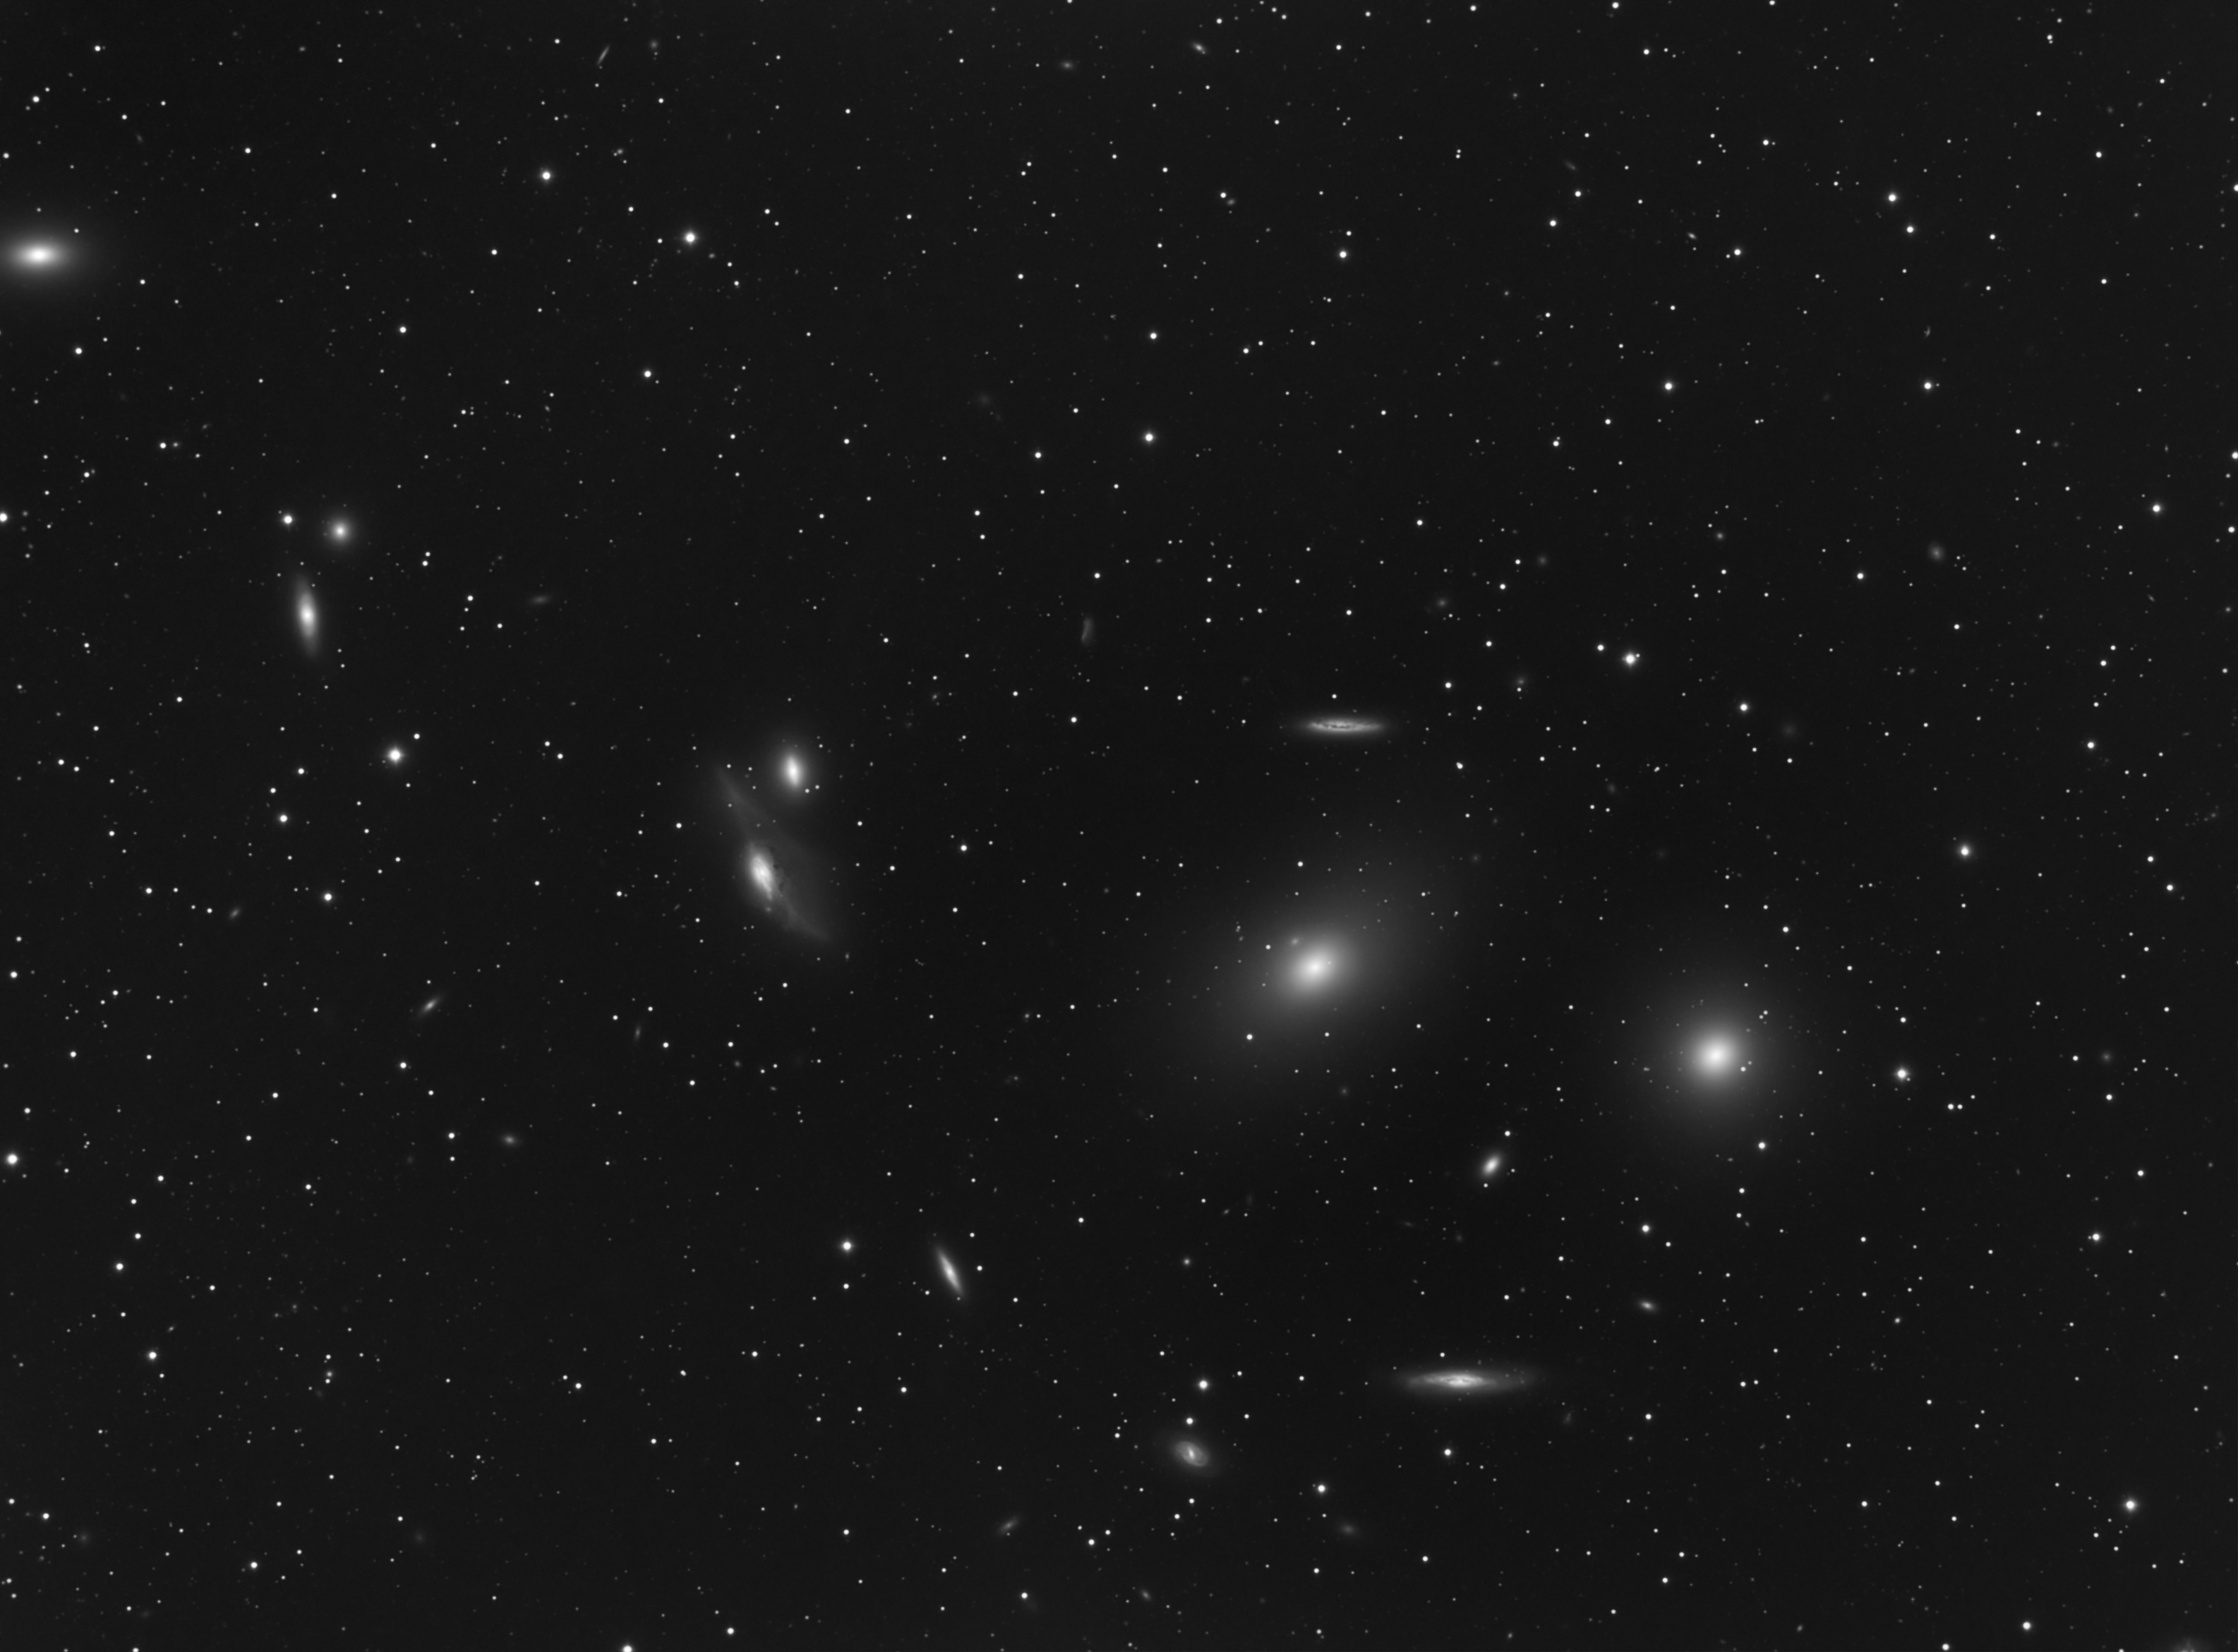
2015 Test Image at WSP – Base of Markarian Chain
Phase 2 included everything that was in the first phase, and added the variable of plate solving with PinPoint under SGP. For this target, I plate solved an image that has been a work-in-progress for the last two seasons, then allowed SGP to center the scope on that target by using PinPoint. The original target image is at the bottom of this post. All of the parameters are not completely settled, there may still be an issue between JNOW and J2000, and the fail-over solve is very slow right now. But the successful PinPoint solves were amazing… a second or less. Very cool and lots of potential.
This second image is made up of a stack of 9 10-minute sub frames. As with the first frame, the scope is a WO 110FLT reduced with the WO AFR-IV flattener/reducer. Camera setup is all SBIG: ST-8300, FW8 with Astrodons, OAG with st-i guide cam.
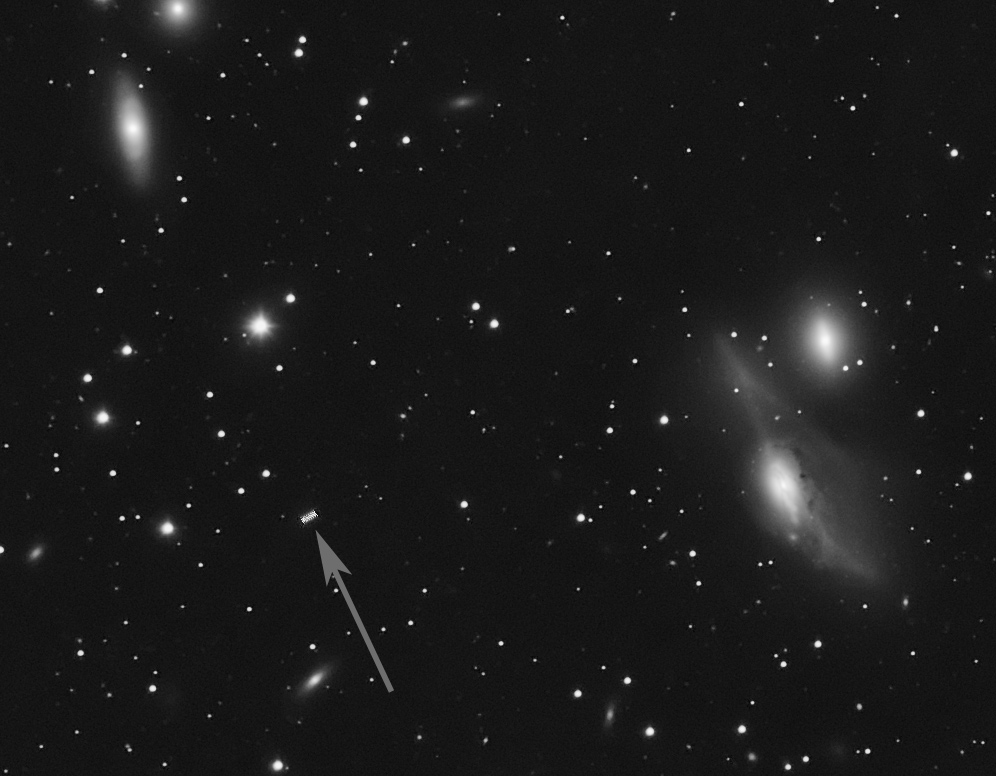
Crop showing Asteroid 508 Princetonia
I didn’t realize it at the time, but I also captured the first asteroid that I realized I have captured… In this case it is 508 Princetonia… it is indicated in the crop from the larger image. Not that it is earth shattering, but it was additional spice to the testing week!
My reference image from last season used as reference for this season’s test image
For the 2011 season, as I trek into the uncharted territory of capturing images at a focal length of 1625mm at f/8, it can only help to ensure that tracking is as good as it can possibly be. It is easy to find research material about what works for others (qualified and unqualified), how good tracking must be for given image resolutions and other theoretical goals for producing excellent images. That research highlights the important considerations for adequate tracking. At some point, though, the experimenter/engineer in a person takes over and insists that he/she tests and confirms what works… with the proof, ultimately, in the pudding. My quest for better tracking will initially focus on polar alignment.
Last season and before, my thought was to use the polar alignment scope, get Polaris in the little circle, and polar alignment would be good enough. And perhaps at focal lengths of 714mm and under, it was acceptable. But this season, my goals are to both achieve better initial polar alignment, and also assess the quality of alignment once the mount is all loaded up and ready to go.
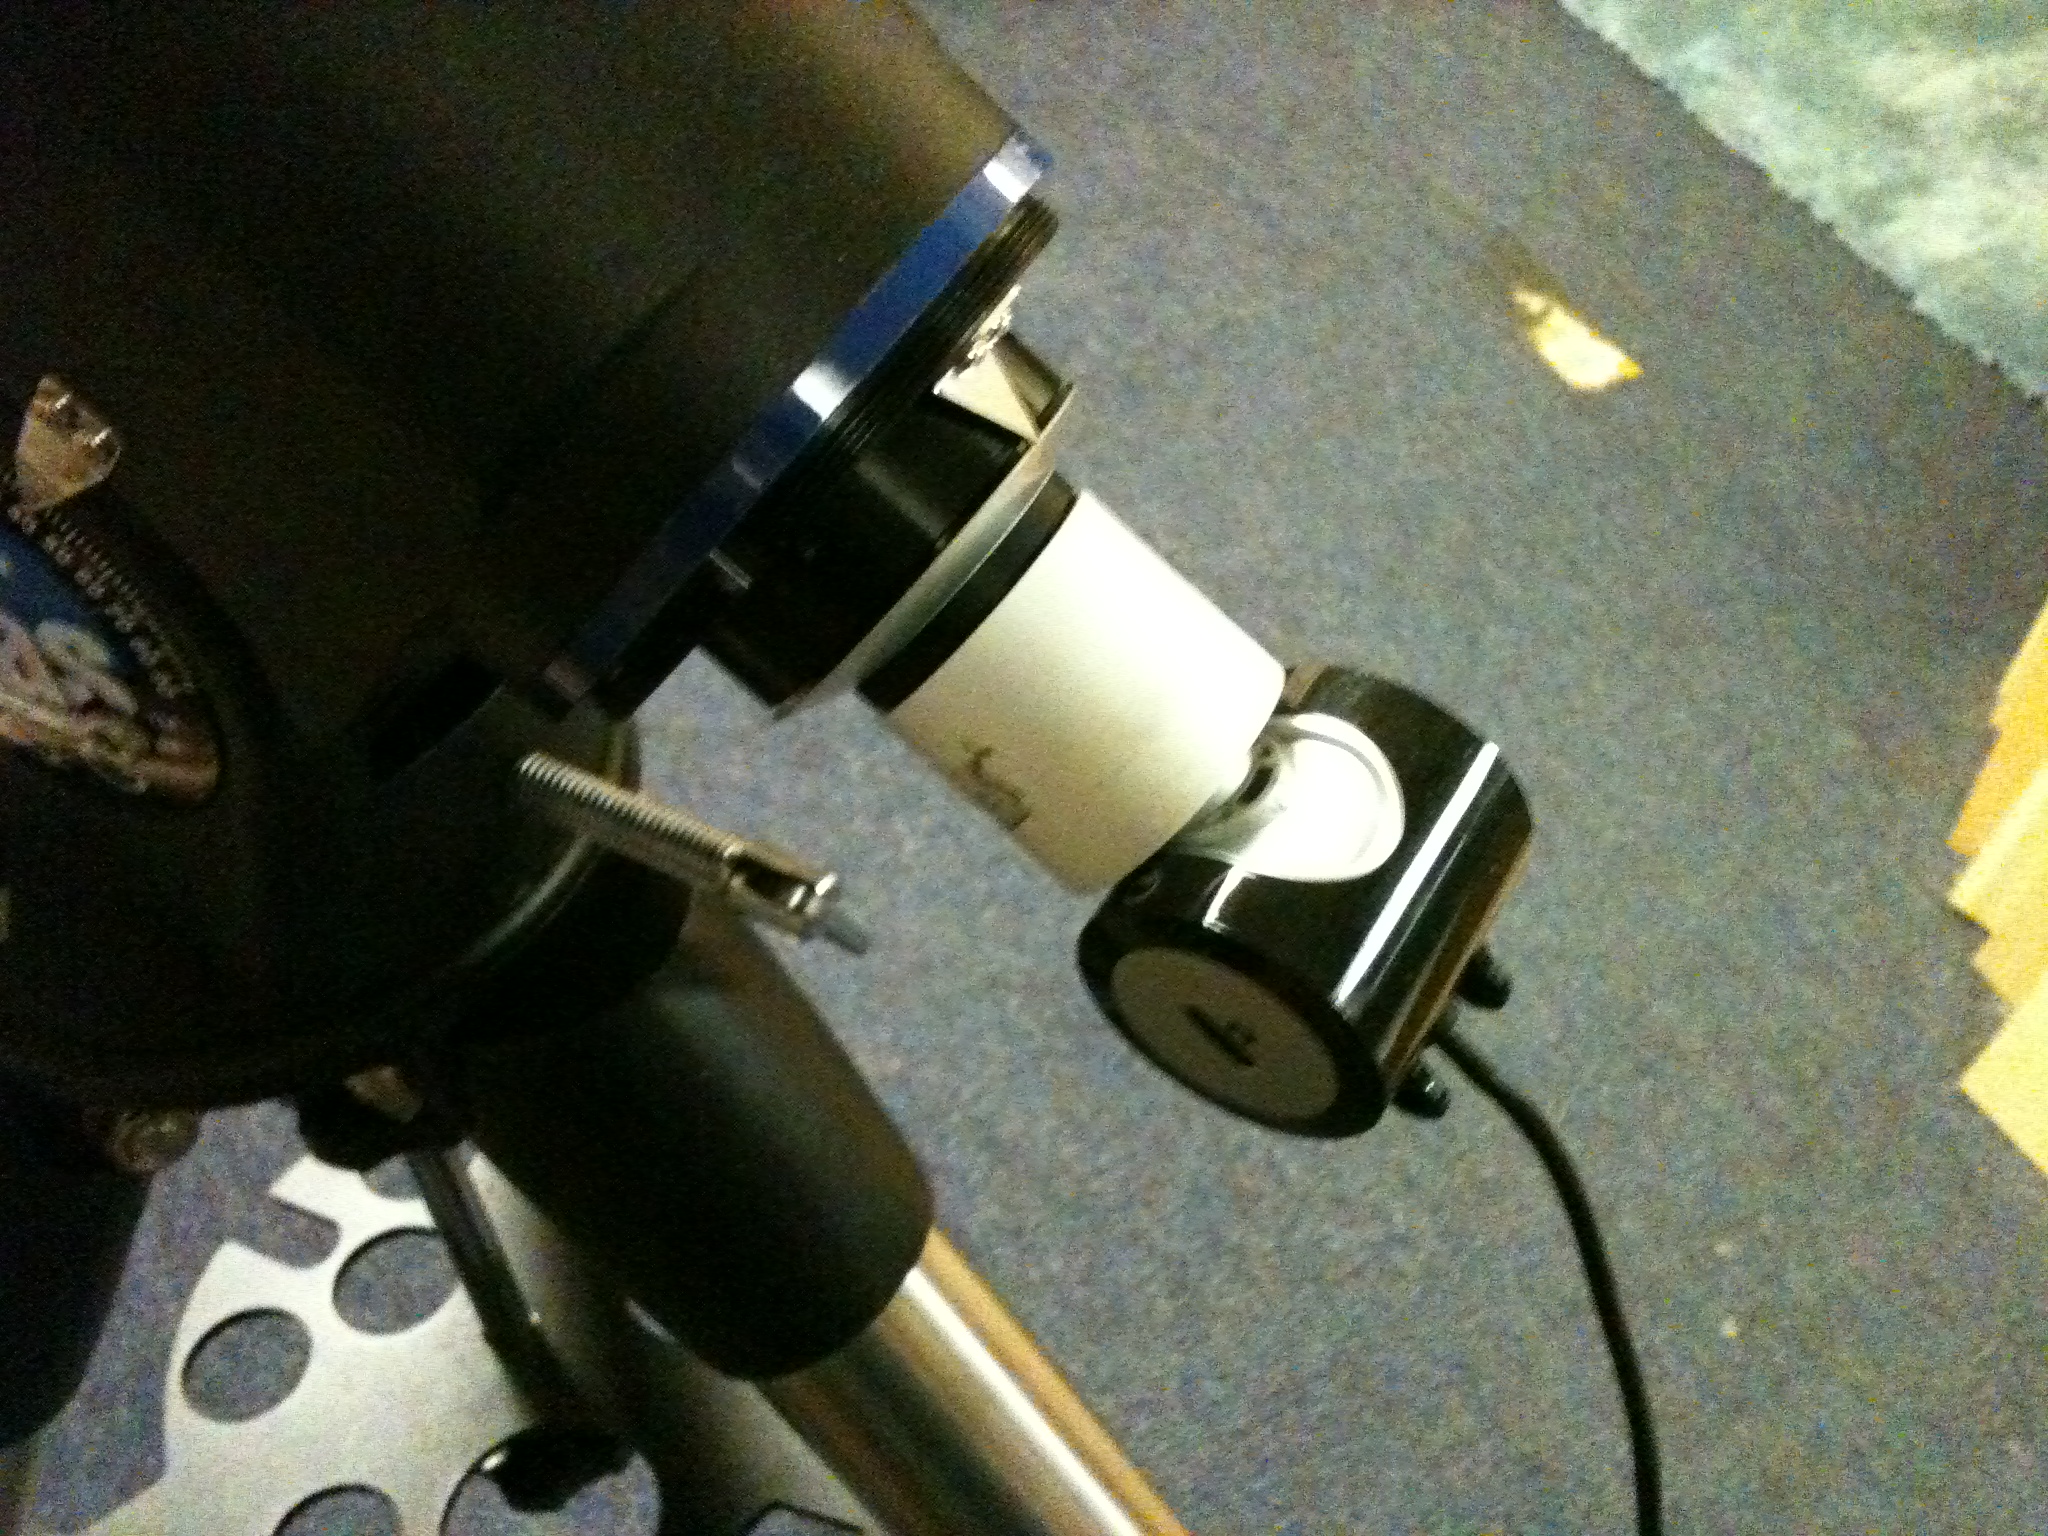
This entry introduces one tool that may help to improve polar alignment, a neat little trick that was first shared (as far as I know) at astronomy shed. This mod is simple and perhaps not really necessary, but it is really cool. And it can certainly make things easier… which can lead to more accurate results. In summary, the idea is to attach a web cam to the mount’s polar alignment scope, allowing the polar alignment to be completed in a comfortable, upright, human position, rather than crawling through the wet grass, looking through the polar scope at an awkward angle, and in the case of our club’s Greene County site, kneeling in cow patties!
My implementation of the polar cam
Here are additional pictures of my version of the mod, however the whole process is much better demonstrated in a video by Dion from Astronomy Shed. To date, I have tested this in the front yard to get things focused, and to ensure Polaris will ultimately be bright enough to identified behind the light of the polar scope (and under a glaring street light). So far, so good. Looking forward to an actual night out soon.


