June, 2019, I traveled to our old home state, Colorado, for my first Rocky Mountain Star Stare. I had a great time, met some really nice people and really enjoyed my traveling companion, Phyllis (my new RV). The organizers did a first class job of running the event and even though I did NOT win the Lego Rocket in the giveaway, they did a wonderful job of making a guy who traveled all the from Pittsburgh feel especially welcome. Special thanks to Tom and Barry!
Phyllis performed admirably and kept me very comfortable during both the traveling and the stay. I broke up the driving days into more or less 500 miles each (~1500 miles each way) and took my time to stop and rest when I wanted or needed. Sometimes I went and made a real meal in Phyllis in the middle of the drive, and even stopped and took a shower in the middle of an afternoon. Some of these diversions were things I haven’t bothered to do on previous trips, but they really broke up the drive and I will continue to incorporate them in the future.
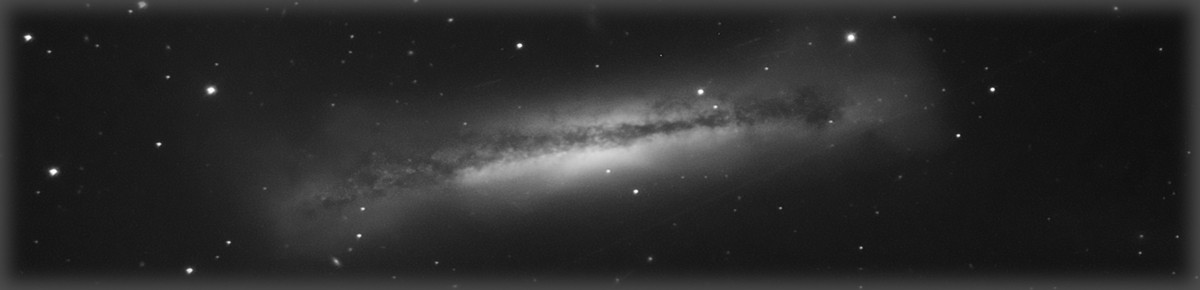
On this trip, I imaged two main targets. I completed one, the Propeller Nebula, and collected some data but not yet enough on NGC 6914.
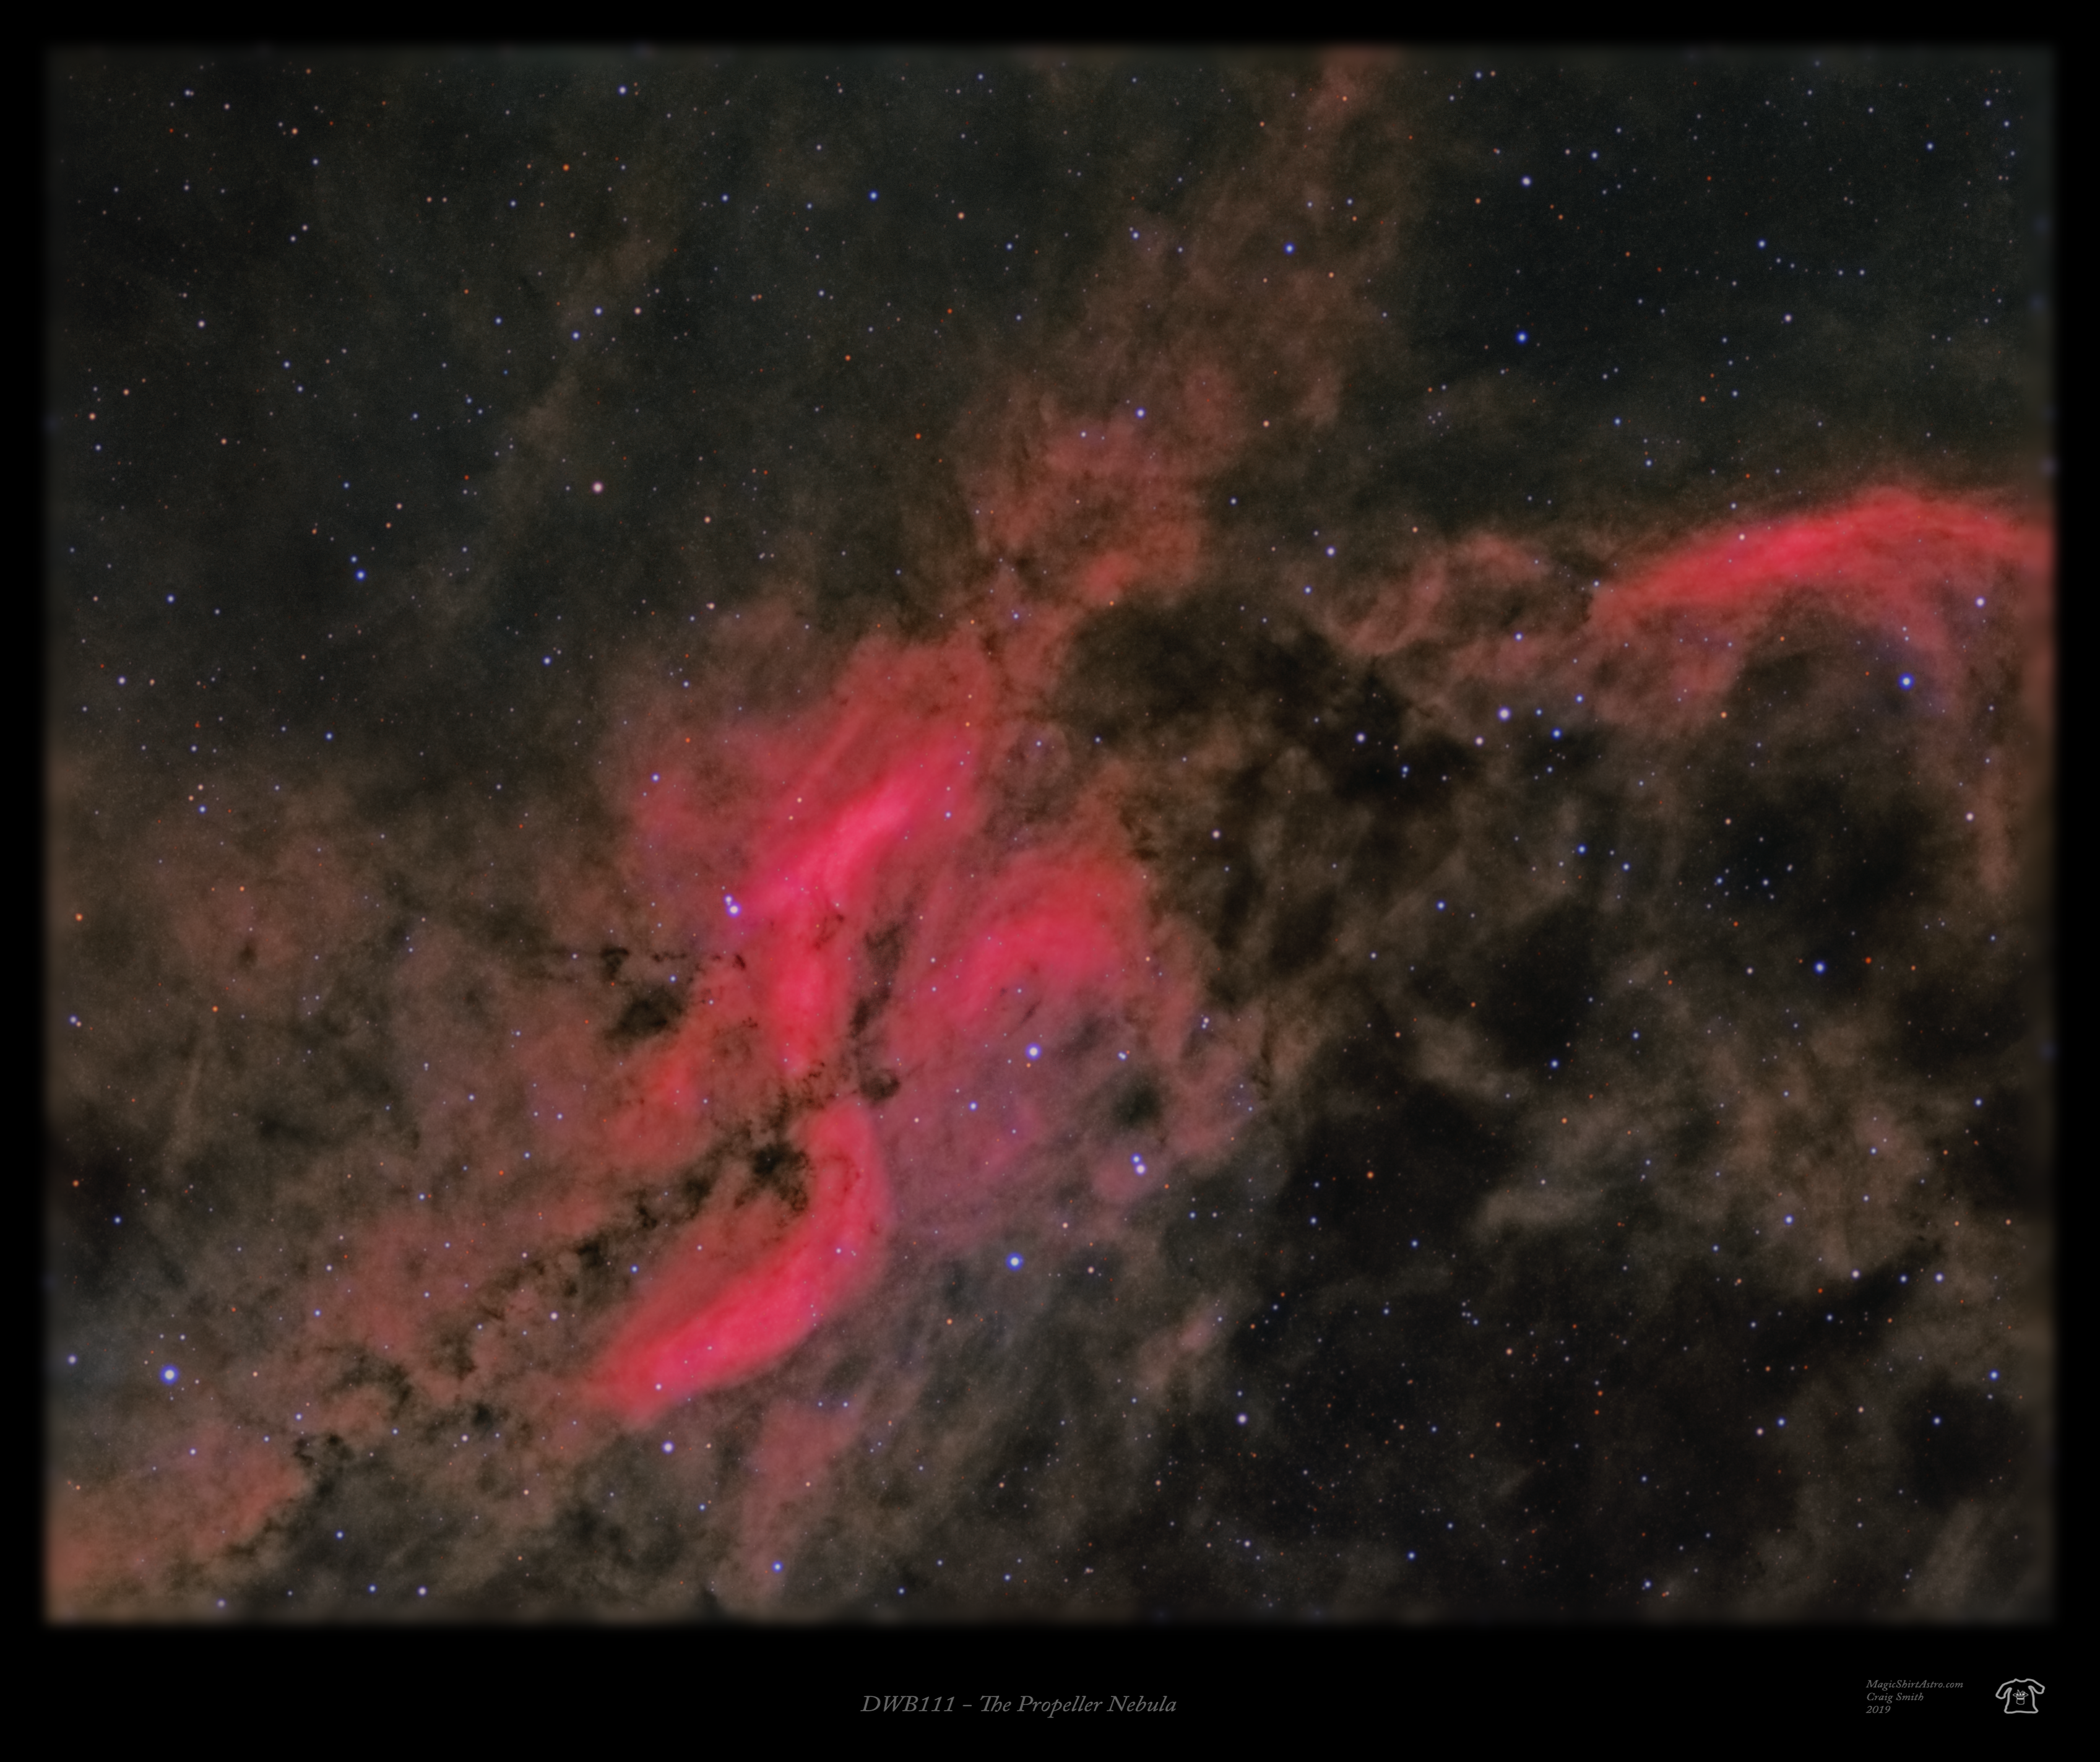
The Propeller Nebula is located deep in the heart of Cygnus and the Milky Way. This area contains all kinds of Ha emission nebula and dust. My presentation of this subject is an HaRGB image that was processed in both Photoshop and PixInsight with an attempt to emphasize the dust. I received some very much appreciated coaching from my son (Josh Smith) in processing this image. For anyone who has seen his work, you know what a talented processor he is so this was a real pleasure for me, and even if it wasn’t for him, he surely acted as if it was.
One of the most interesting things about this target is that nobody seems to understand what the heck this thing is or what causes its shape. I find that fascinating because it is a very popular target that is captured by amateurs and professionals alike, but in every description… “nobody really knows what is going on with this.”
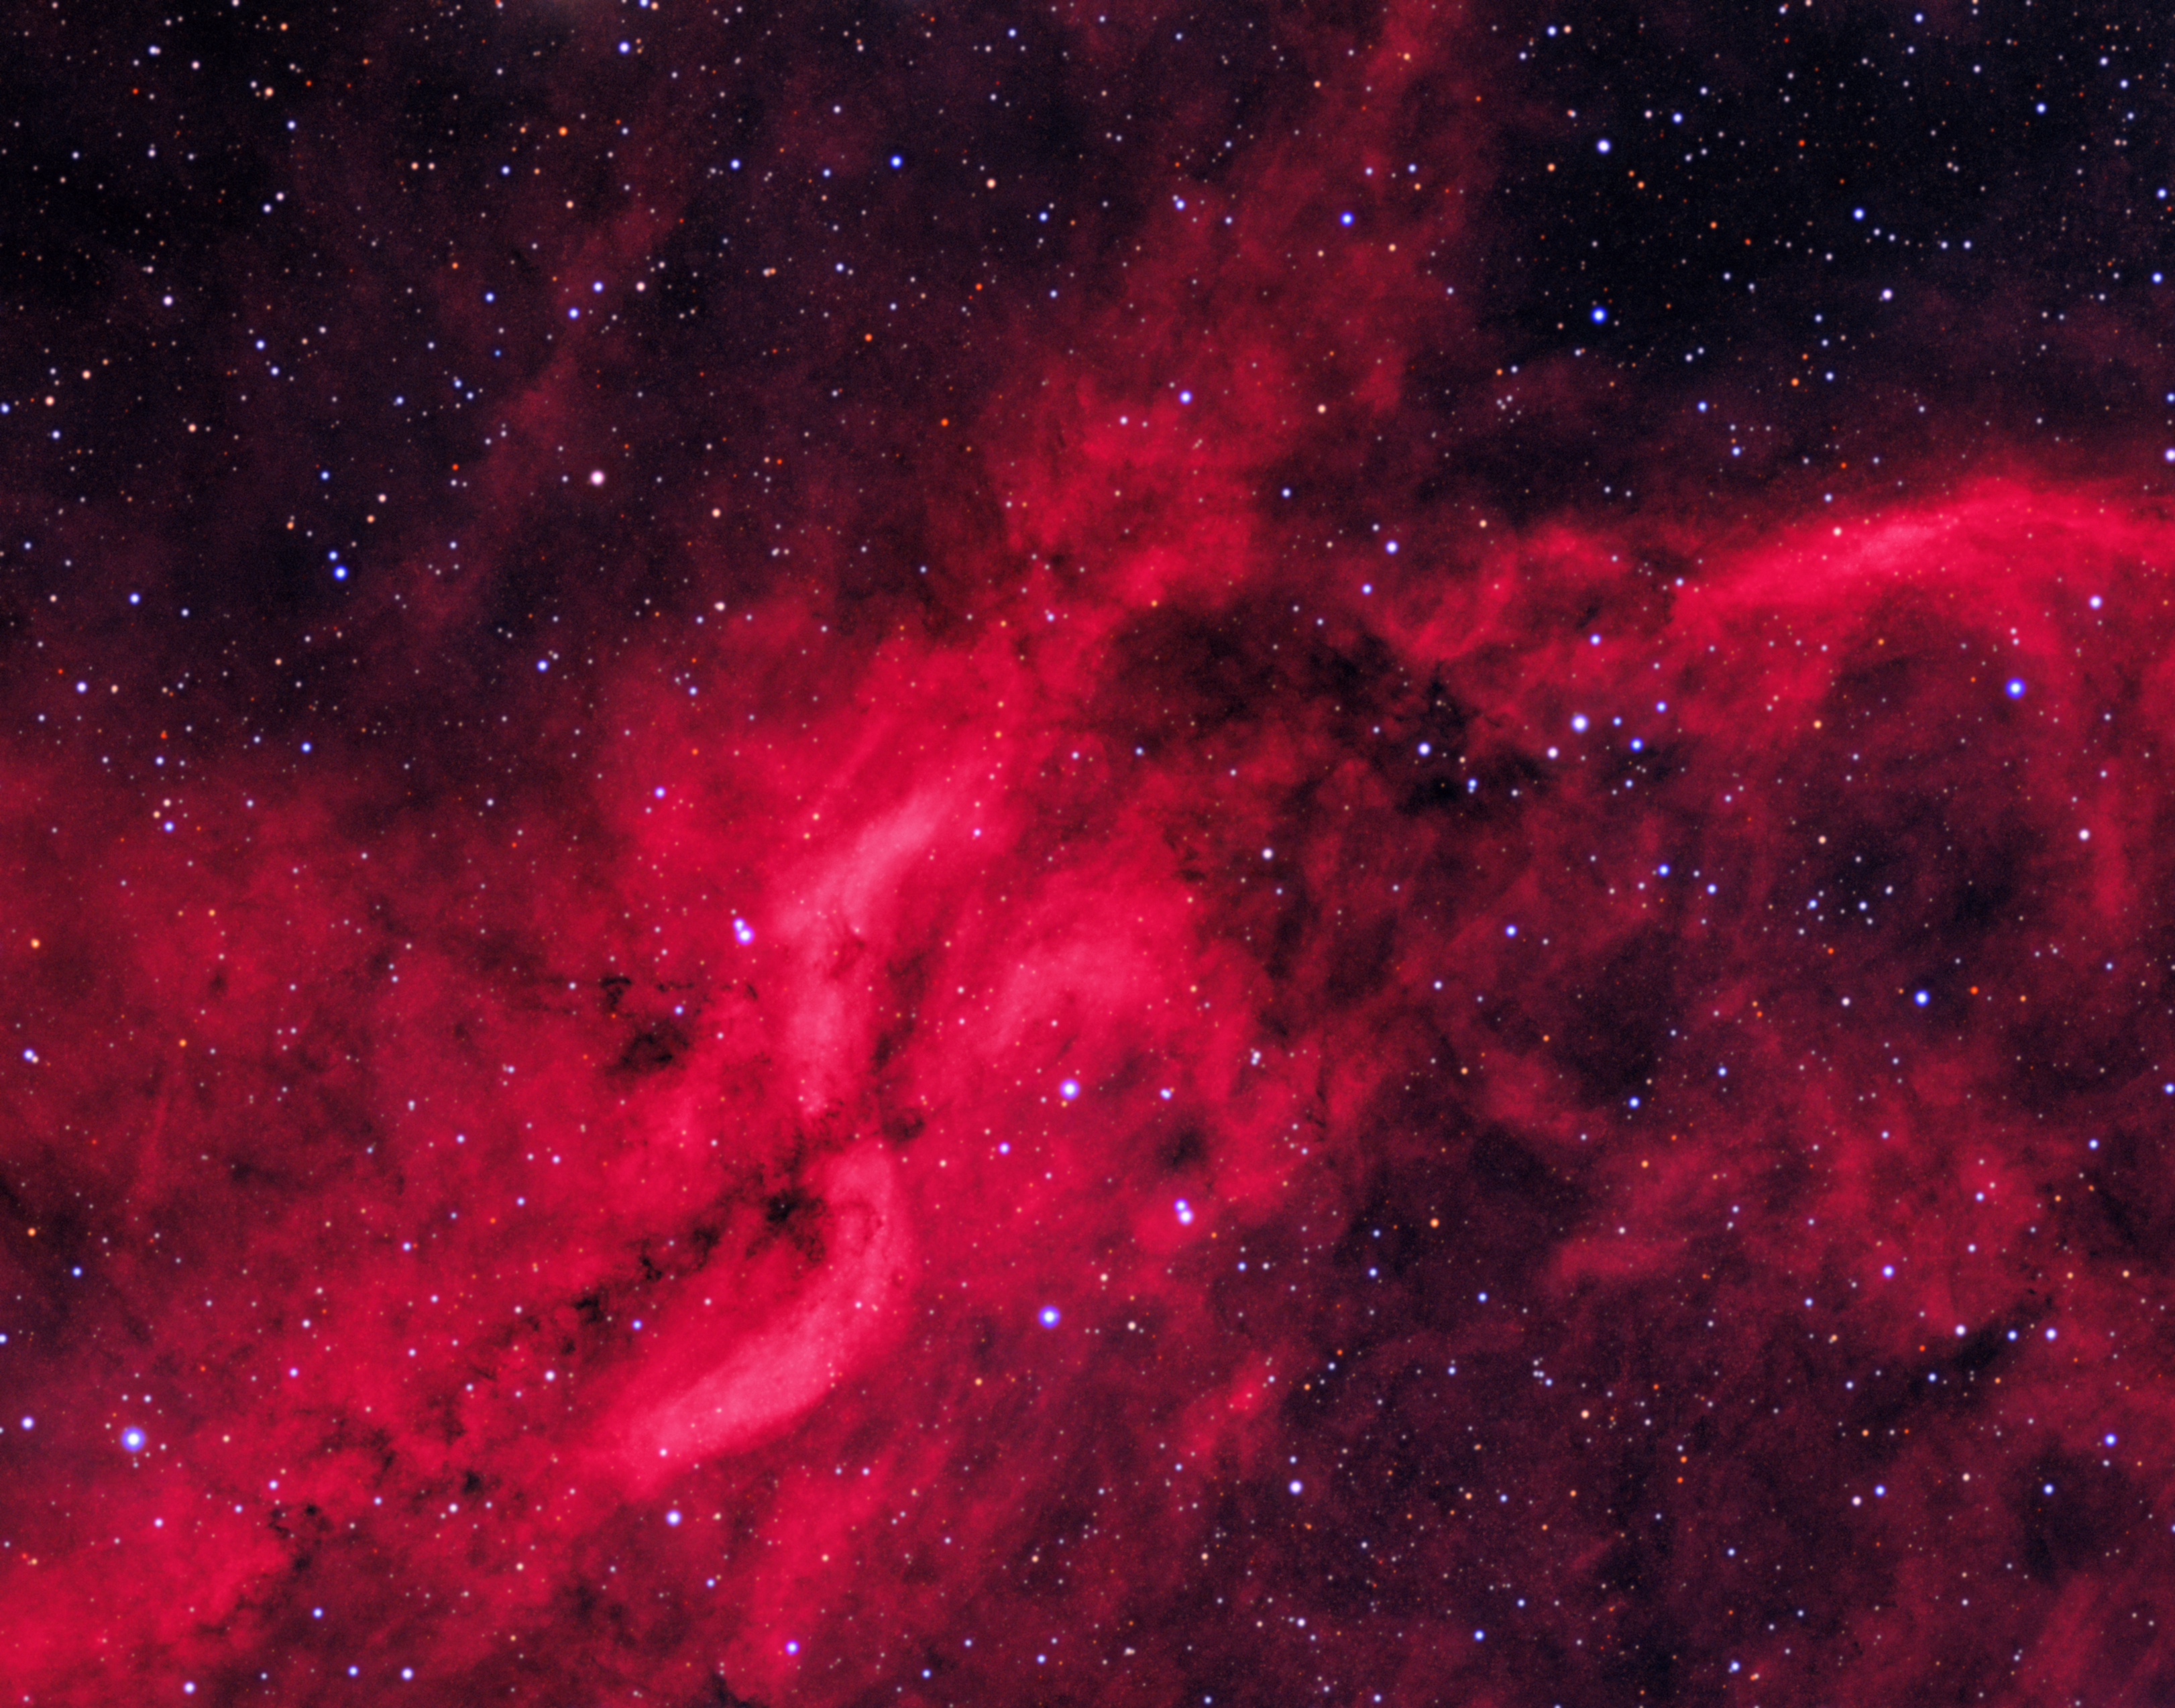
To give you an idea of how differently the same data can be handled, take a look at the at my first pass at processing the same target. Still a pretty decent looking image, right? But, not really the same richness or depth or frankly, interest, as the “Rev 2” image above – at least in my opinion. And certainly it has a very different appearance.
Just for fun, I have included a few short time lapses from the Star Stare. The first one is of my telescope setup process. I wanted to capture the snow capped mountains in the background, so I had to set up the camera a long ways away, then zoom in quite a bit during post-processing.
When there are clouds passing that dramatically change the light there are different ways to handle the situation. In this case, I focused on the sky and kept the brightness of the sky constant while allowing foreground brightness to vary. Often this has the most natural appearance because the sky doesn’t really change brightness very much.
In this case, though, the varying foreground seemed a little jarring, to me. More experimenting is in order, I think.
I also did a time lapse of setting up my SkyBox to help keep the telescope more protected during the forecasted winds for some evenings. In contrast to the previous time lapse, this one was processed to hold the foreground brightness consistent and let the sky vary as clouds rolled past.
And finally, perhaps, a more interesting time lapse for astrophotographers, is the following abbreviated test I made of a Rokinon 8mm f/3.5 Fisheye Lens. This was captured with my Canon 70D. Exposures varied but by the time it was fully dark, the lens was fully open, and I was capturing for 20 seconds at ISO 1600. Processing was in LightRoom and LRTimelapse. The bright planet that you can see even before dark is Jupiter.
The RMSS presented some new challenges to me because it is the first event that I have attended since I started going to star parties in an RV where there is no field power provided. I haven’t lugged around extra batteries with me for several years, so I decided that I was going to try to run my telescope gear off the battery bank of Phyllis (my RV). “Battery bank” sounds exotic, but in my case it is really only two Trojan T-105 golf cart batteries. From a back-of-the-envelope calculation, I thought I would be okay, but to be honest, I was a little fuzzy on the details.
As a result, I spent some time studying about my batteries, their capacity, and their recharging. While this is probably uninteresting to anyone who doesn’t own an RV, I will still share some bullet points for my own benefit, if nothing else.
- My battery bank capacity, if fully charged and healthy, is 225 amp-hours. My telescope gear, even with the dew heaters running draws 3-4 amps tops. The imaging window for me on this trip was something less than 8 hours per night… so my gear was using something like 30 amp-hours. This doesn’t include the power requirement to maintain or charge the remote laptop used to run the setup, which might be about the same amount of power as the rest of the gear. So if I were to fall asleep and allow the laptop to run all night, that is closer to a total of 60 amp-hours.
- Even deep-cycle golf cart batteries would like to be discharged only to about 50% so in the worst-case scenario described above, I am roughly using half of my power capacity to run my telescope and laptop.
- Phyllis’ needs can be quite variable, but if careful with the lights, she should only be drawing a few amps… unless the furnace is running, or the hot water heater (solenoid), or the Fantastic Fan. Then usage goes up dramatically.
- But with care, and if my batteries are in good shape and charged, it seems like I should be able to use less than my 110 to 120 amp-hour budget over a night.
- The challenge comes in when it is time to recharge the battery bank. For example, I have two 100 watt solar panels. The most optimistic estimates for their output under the strongest sun would be about 30 amp-hours each. That just isn’t going to get it done.
- I have a generator that can output plenty of power to either run a battery charger or can power the converter in Phyllis that can then charge the batteries. In my case the battery manufacturer recommends a maximum charge rate of 10-13% of capacity or ~20-30 amps… and this is pretty typical. Unless there are a lot of DC loads that Phyllis is supporting, the internal converter (55 amp capacity) should be able to provide all of that and more.
- The problem is really one of time. It take 3-6 hours of charging time at the full charge rate to reach 85% to 90% of charge for the battery bank. The last 10-15% can take that long again because the charge rate is necessarily reduced. So realistically, on a consecutive night two, it is difficult to be fully charged back up, given the amount that I potentially discharge my battery bank.
- Finally, I learned that the best way to judge the state of health of the battery bank is to use a hydrometer and actually measure the specific gravity of the acid. There are very specific instruction on the Trojan website for collecting and using this information. I ordered a hydrometer, but I haven’t done the actual testing yet to see where I stand.
- So my conclusions are as follows (subject to learning more, as always: 1) the 200 watts of solar panels are great and I feel good about using them and they will probably keep Phyllis topped off in situations where I have field power for running the telescope and not too large a load in Phyllis. 2) For nights where I am heavily discharging the battery bank, I need to run the generator. A lot. Six-eight hours per day seem to be needed to start out the night at nearly 90% charged. 3) Adding more charging capability or changing the converter probably will not make a significant difference. If I really want to do something, that thing would be to increase to a 4 battery bank, and then I might be able to make use of more charging capacity, too (ultimately this would be better because I could meet my power requirements without having to so deeply discharge my battery bank). The converter change might provide a subtle improvement both in charge time and in battery longevity due to a slightly better charging profile, but it would not provide major differences, all other things being equal.
Stay tuned. More to come.